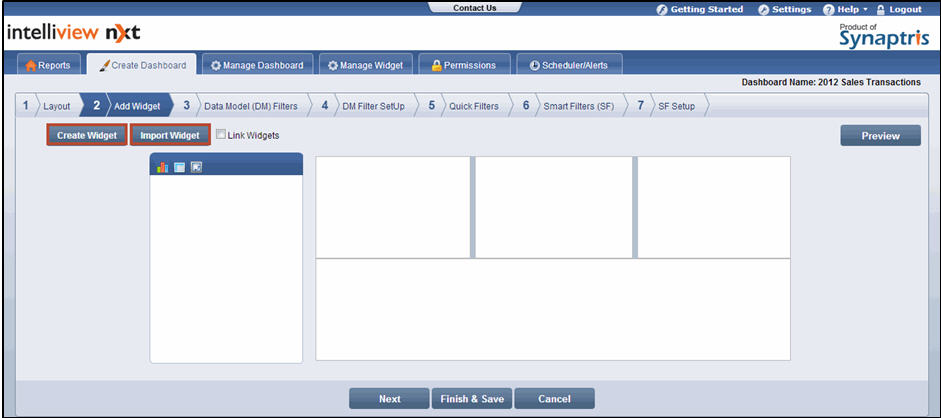
On the Add Widget page, do one of the following:
Click Create Widget. The Connection & Data Model page is displayed. For more information, refer Create Widget
-Or-
Click Import Widget. The Import Widget page is displayed. For more information, refer Import Widget

![]() Note:
Note:
The widgets you create or import are listed on the left pane of the Add Widget page
Select the Link Widgets check box to link widgets. Linking widgets propagates any drill down activity you make in one widget to the remaining widgets in the dashboard. If the widgets are not linked, you can drill down on each widget independently without propagating the drill down in one widget to the other widgets
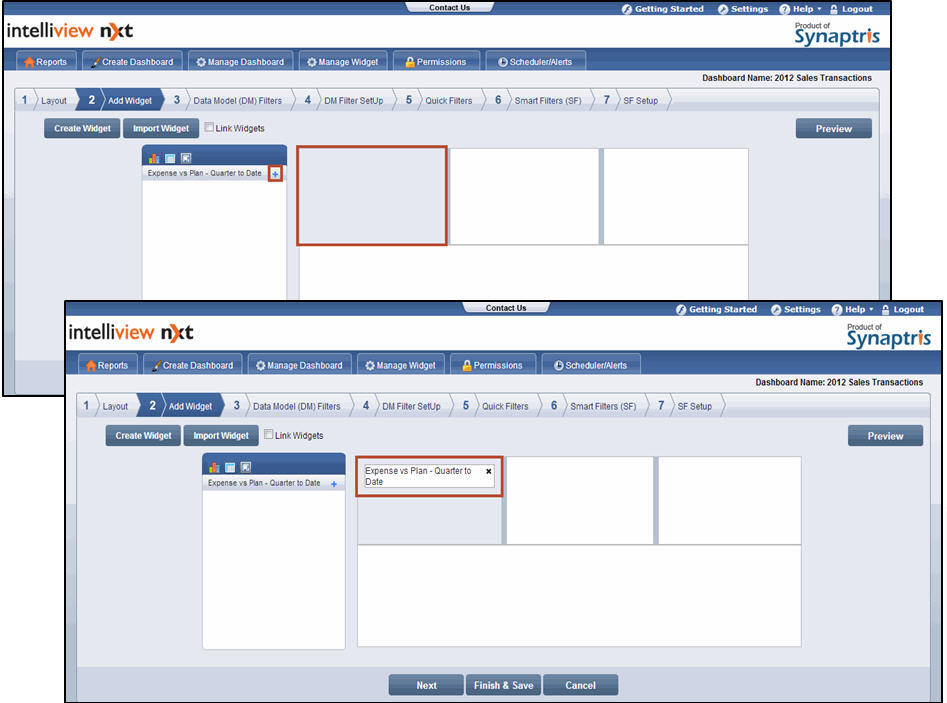
Select an appropriate layout area on the right and click ![]() corresponding to the widget that you want to add to the dashboard. The widget is added to the layout. You can add any number of widgets as allowed by the layout
corresponding to the widget that you want to add to the dashboard. The widget is added to the layout. You can add any number of widgets as allowed by the layout

![]() Note:
Note:
Click ![]() to remove the widget from the layout
to remove the widget from the layout
Click Preview to view the preview of the dashboard. You can view the preview only after adding atleast one widget to the layout area
After adding the widgets to the layout area, do one of the following:
Click Next. The Model (DM) filters page is displayed:
-Or-
Click Finish & Save. The Homepage is displayed. After saving a dashboard, you can make changes to it using the Manage Dashboard menu. For more information, refer Manage Dashboard
![]() Note:
Note:
Click Cancel to exit creation of the dashboard. If you cancel the dashboard on the Add Widget page, a copy of the dashboard is saved as a draft. This allows you to access any widgets you may have designed in the dashboard
You can access the draft dashboard from the Manage Dashboard menu and can either finish creating the dashboard or delete the draft dashboard
<<Layout | Data Model (DM) Filters)>>