Throughout the process of creating the dashboard, you will see the menu tab illustrated below on top of each page. This menu tab will always give you an idea of where you are in the process of creating the dashboard. Steps 3 to 7are the steps where you will apply filters to your data if you wish to do so. All the Filter tabs are optional steps.
![]()
In the section below the menu tab of the Create Dashboard screen, you will do the following two things:
Name your Dashboard - The first step is to name your dashboard – choosing a meaningful name for your report will help you keep track of your reports.
![]() Note:
Note:
You can enter any of the following in the Dashboard text box:
Letters between 'a' and 'z'
Numerals between '0' and '9'
Special characters such as ’_’, ’-‘, ’(‘, ’)’, ‘*’, and ‘@’
Select Layout - Next, decide on how you might want to lay out your report. Envision the number of sections you want in the report while you make this selection. Readily available formats are the One column, Two column and Three column. You will see that if you pick any one of these three options, “Select Layout” offers further layout design options to go with each of the selection. You can also pick the “Custom Layout” option and have complete control over layout design.
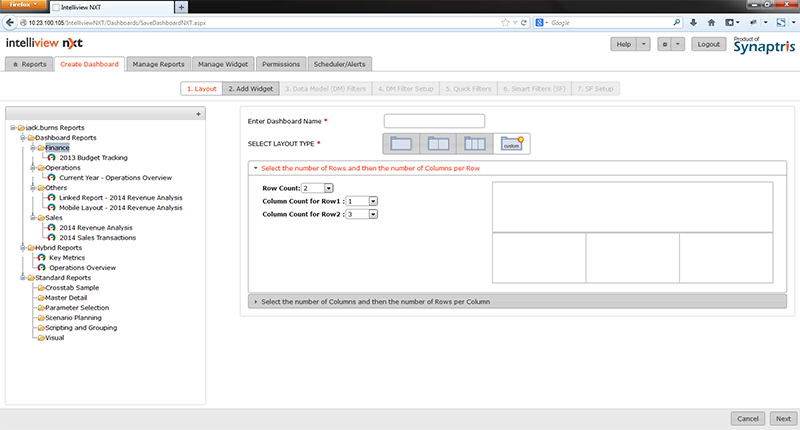
Not only does this option allow you to pick number of rows or columns in your layout, it also allows you to customize each row and column in your design.
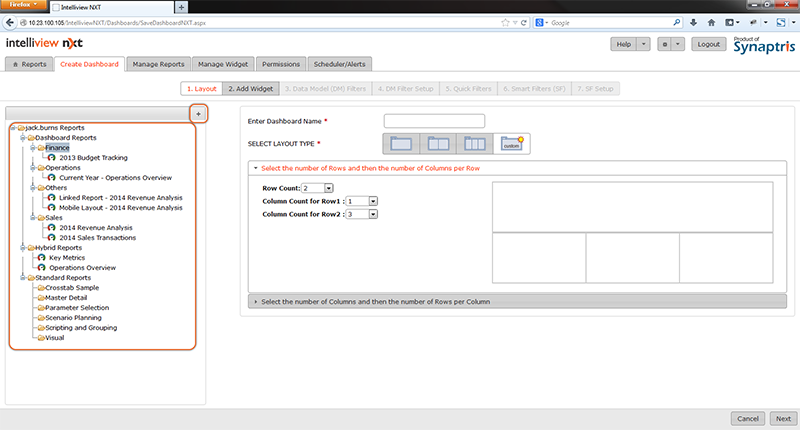
On the left side of the Create Dashboard screen, you have a view of the folders to which you have access. You can pick which folder you want your report stored in. If you wish you may add new sub-folders to the selected folders by clicking on the + sign. Once you have named your report, picked a layout, and decided on the folder to save your report click on “Next”.
![]()
<<Create Dashboard | Create Dashboard - Add Widgets>>