Each widget is associated with a dashboard. You can reuse widgets by importing copies into new dashboards. Changes made to the imported widget will not affect the original widget. You can also create or import new widgets in an existing dashboard using the Manage Report menu.
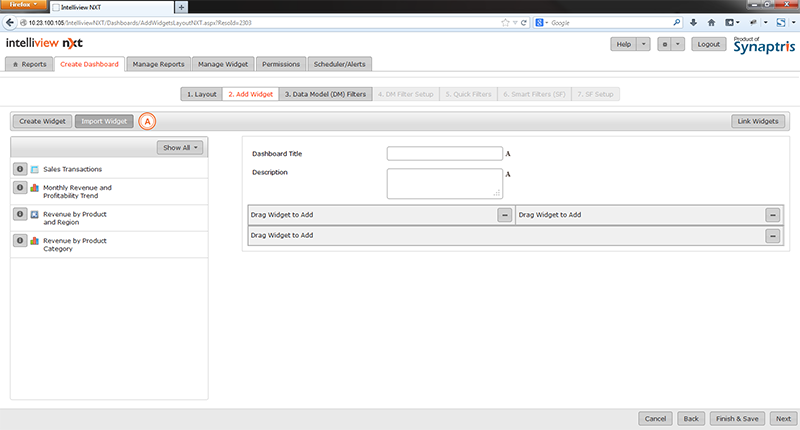
This button will let you browse through all widgets available in other dashboards. You can import selected widgets into your current dashboard.
If you wish to import widgets from other dashboards, click on the Import button.
|
A |
To access list of widgets available with other dashboards that can be imported into this dashboard, click here. |
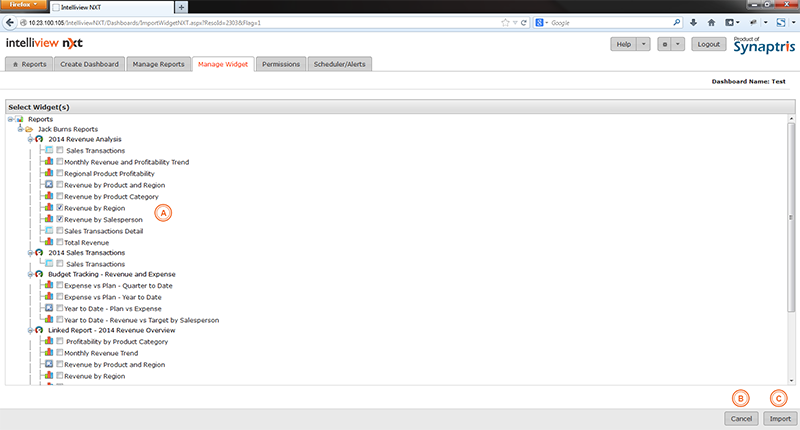
When you click on the ‘Import Widget’ button, you will be presented with list of all widgets available to you from all of the other dashboards. This is illustrated in the next image. From this list, choose the widgets you wish to use and then click on ‘Import’ button
|
A |
Check this box if you wish to import this widget |
|
B |
If you wish to cancel this operation press ‘Cancel’ button. |
|
C |
Click here to import widgets you have selected into your dashboard |
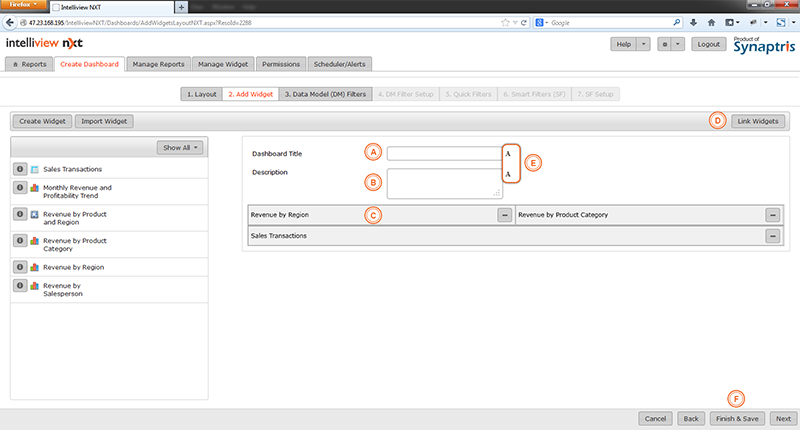
The final step in the process is to add one or more of the widgets that you created/imported which are listed on the left pane to the widget panel(s) on the right pane.
The point to take away here is that not all widgets from the library need to be added to the widget panel (and) not all widget panels on the right need to be populated with a widget in order to complete the dashboard creation process.
You can for example choose to just use 3 widgets out of the library of 6 widgets to complete the initial dashboard design and mix and match various combination of the widgets while viewing the dashboard using the “edit dashboard” menu option and save each combination as a separate sub report. We will cover this in more detail in the Report Editing section.
|
A |
Title for the report |
|
B |
Description of report to explain the context and purpose of the report. The description displays in the Info popup. The Info popup can be viewed by clicking on the “i” icon on the top left corner of the dashboard |
|
C |
Place the widgets you want in your report in these spaces. You may drag the widget to a space or you can add the widget by pressing + in the space where you want to place the widget and selecting the widget from the drop down list |
|
D |
Link your widgets up if you wish to be able to propagate actions such as drill down to apply uniformly across all widgets in your dashboard |
|
E |
Font and Font Size selection options for Dashboard Title and Dashboard Description |
|
F |
If you wish to ‘Finish and Save’ your dashboard at this point, you may do so. The 5 steps that follow after this point in the dashboard creation process are optional |
After the widgets have been added to the dashboard you may choose to ‘Finish and Save’ your dashboard as the steps that follow in the create dashboard process are optional.
If you have added widgets to the right panel and saved the dashboard, the dashboard will list on the navigation tree on the left side of the Home Page and you can view it by clicking on it.
If you save the dashboard without adding any widgets to the right pane, the report will not be listed on the Reports (Homepage) screen. The dashboard gets saved as a ‘Draft” and can be accessed by going to the “Manage Reports” menu option.
Intelliview NXT offers you numerous methods to define filter parameters specific to the Dashboard using which users can customize the report while viewing it.
The three different kinds of filter parameter that can be defined are the Data Model Filter, the Smart Filter and the Quick Search Filter. These filters apply to all the widgets placed on the dashboard.
![]()
<<Create Table Widget - Save Widget | Data Model (DM) Filters>>