The ‘Import Company’ function is used to import metadata of one or more companies provisioned in the prior version to the current version of Intelliview NXT (prior installation). This feature may also be used to move the company metadata from one instance to another instance of current version of the Intelliview NXT (current installation).
1. Using the Super Admin credentials login to Intelliview NXT (current installation).
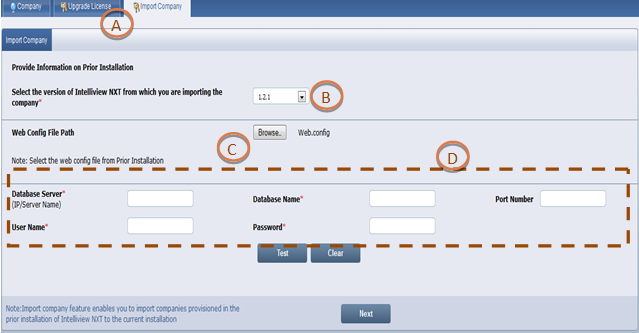
2. Click the ‘Import Company’ tab (A).
3. From the drop-down box (B), select the version of Intelliview NXT (prior installation) from which you need to import the company.
4. Select the path of the web.config file of the prior installation (C). If the prior installation is on a different system, then the current installation should have network reachability to the web.config file. You can click the ‘Browse’ button to select the folder in the prior installation.
5. Details of the database containing the metadata of the prior installation are fetched and populated in the corresponding text boxes (D). You may modify any of these, if necessary.
6. Click ‘Test’ button to verify the connection to the database. If the connectivity to the database is successful, the system will display the message: ‘Connection Test Successful’; otherwise ‘Connection Test Failed’ message will be displayed, and you need to ensure that the connection is correct to proceed further.
7. Click ‘Next’ button.
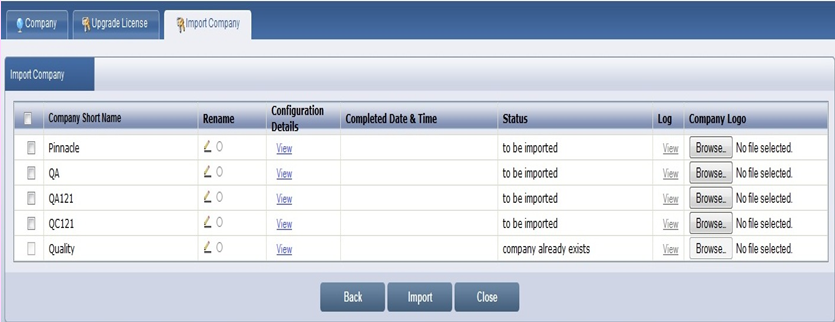
8. All Companies in the prior installation are listed with the following information:
• Company Short Name: Short name of the Company. You can select the corresponding check box to select a Company for import. You can select one or more Companies for import. Please note that you will not be able to select a Company, if the name already exists in the current installation.
• Rename: You can click Edit ‘ ‘ icon to rename the company during import of the Company.
• ‘ ‘ Indicates that the company name is not changed yet.
• ‘ ‘ Indicates that the administrator has changed the company name.
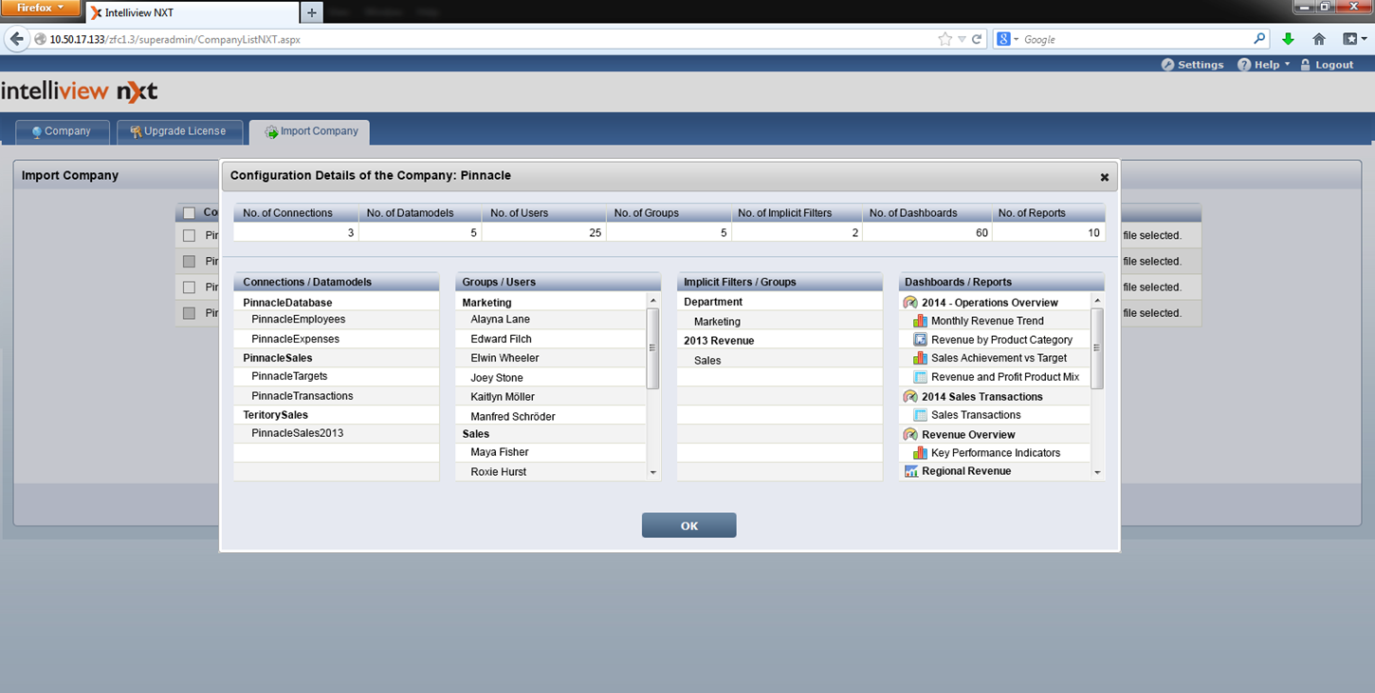
• Configuration Details: You can click the ‘View’ link to view the data entities (such as connections, data model, users and groups) from the metadata of the prior installation which will be imported.
• Completed Date and Time: Indicates the date and time on which the last import operation was performed for the company.
• Status: Indicates the status of the Company’s import process last time.
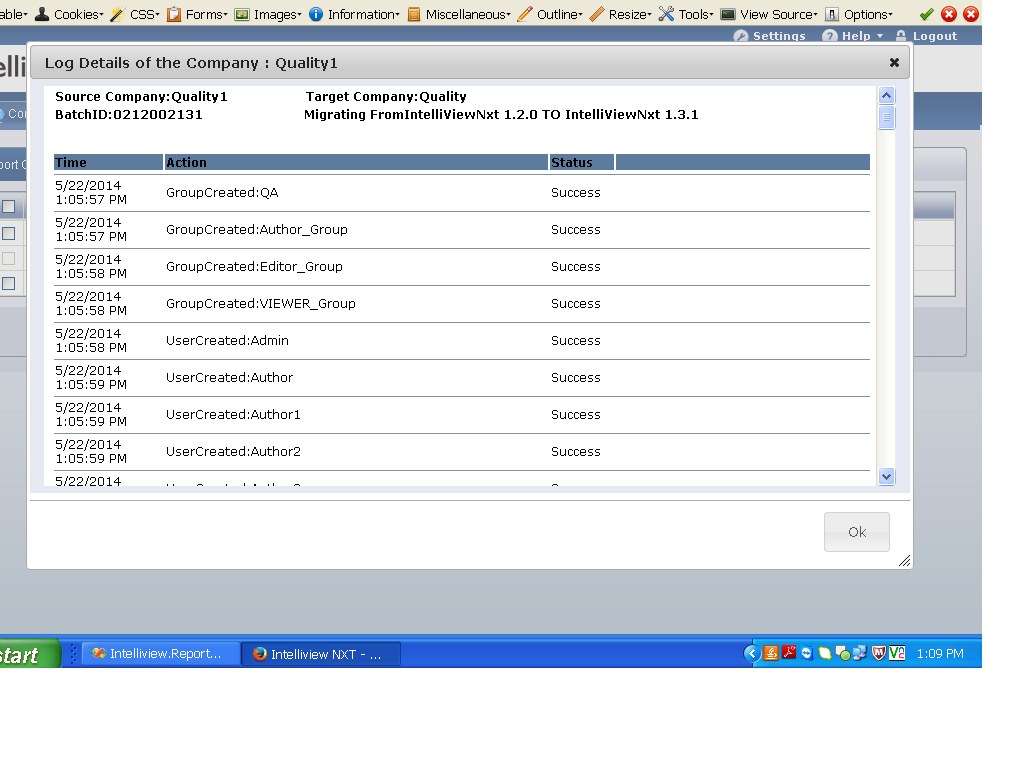
• Log: You can click the ‘View’ link to view the import activity log of the Company.
• Company Logo: The Company logo file, if any, can be attached here.
9. You can click ‘ ![]() ‘ icon to rename the company.
‘ icon to rename the company.
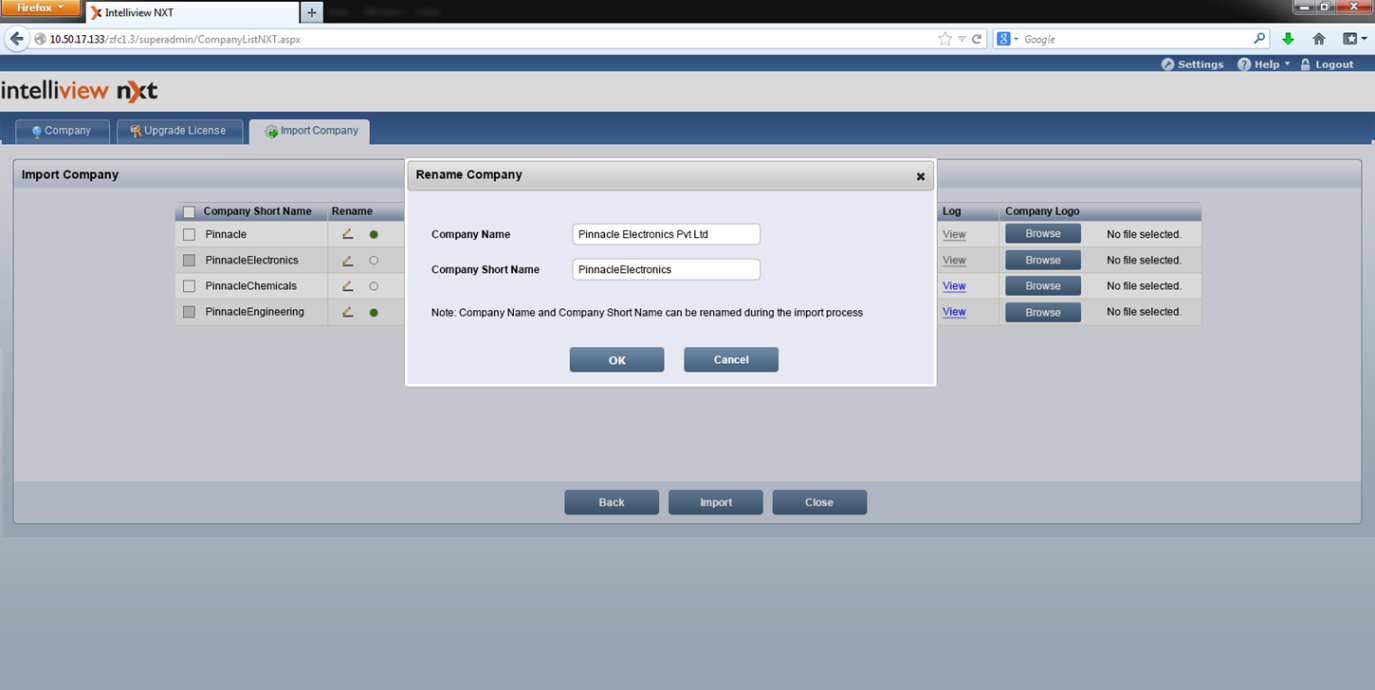
• Enter the Company Name and Company Short Name in the corresponding text boxes. Click ‘OK’ button.
10. Click ‘Import’ button to initiate the import process of the selected companies.
• The system will extract the metadata of the selected company(ies) from the prior installation and will create the new company(ies) in the current installation, with the new name(s).
11. On successful migration, the Company name page will display the date and time of the migration completed. In case of issues in migration, an error message will be displayed.
12. In either case, you can click on ‘View’ to view the log of the procedure.
![]()